
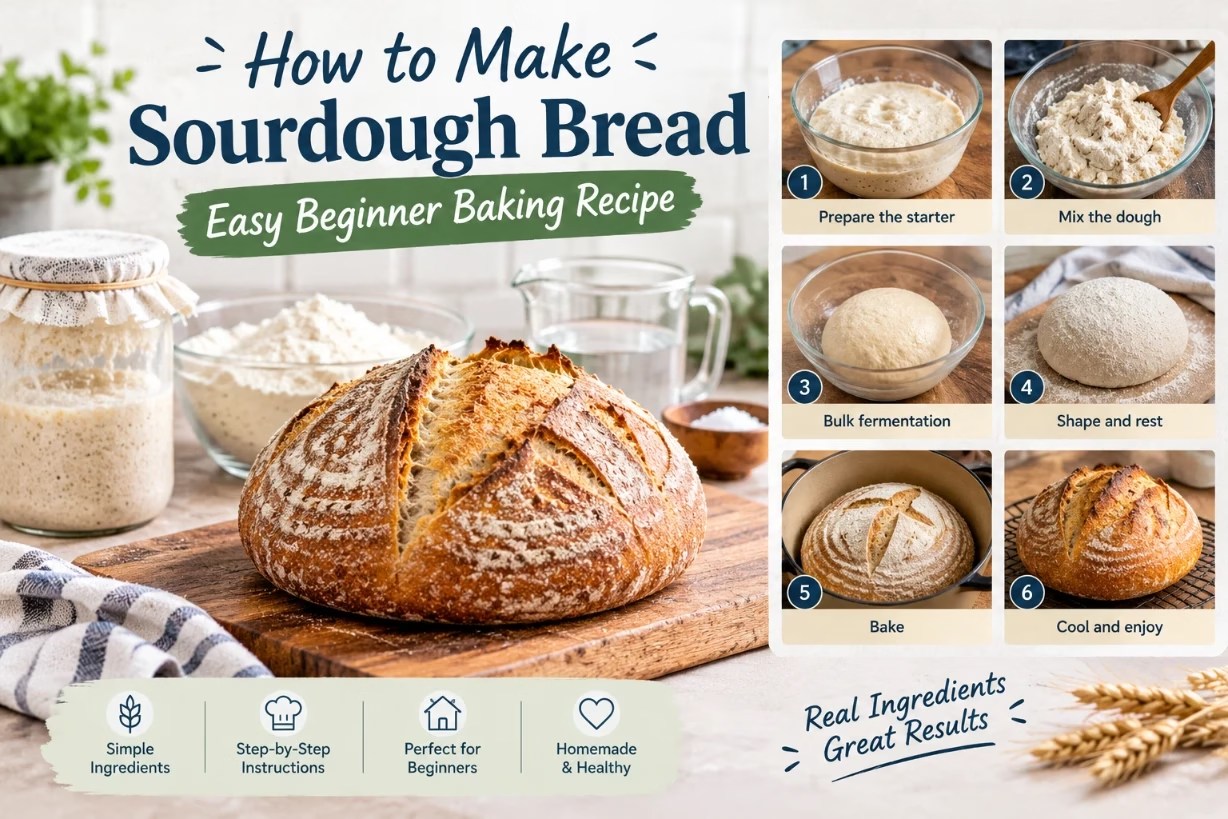
To make sourdough bread as a beginner, you mix active sourdough starter, flour, water, and salt into a soft dough, let it rise in stages, gently shape it, give it a final proof, then bake it hot in a covered pot so it rises well and forms a crisp, deep golden crust.
If you have been wondering how to make sourdough bread without feeling lost or stressed, you are in the right place. I will walk you through a simple, forgiving beginner baking recipe that you can follow at home with basic tools and ingredients. My goal is to help you pull a real sourdough loaf from your oven, not just scroll through another pretty picture and give up.
Why Sourdough Is Different From Regular Bread
When people ask how to make sourdough bread, they often expect it to act like store yeast bread. It does not. Sourdough rises slower, tastes deeper, and needs more patience, but it also rewards you with flavor and texture that dry yeast usually cannot give.
Sourdough uses a live culture called a starter. This starter is just flour and water that has been fed over days until wild yeast and friendly bacteria grow strong in it. That mix of yeast and bacteria:
- Makes the dough rise without commercial yeast
- Adds a gentle tangy flavor and complex aroma
- Can make the bread easier to digest for some people
So when I talk about how to make sourdough bread easy for beginners, I always start from the starter. If your starter is healthy and active, the rest of the process becomes much more forgiving.
Step 1: What You Need To Get Started
You do not need a fancy kitchen to learn how to make sourdough bread. Most of the time, I use only a few simple tools and ingredients.
Basic Equipment
Here is what I reach for every time I bake:
- Digital kitchen scale for accurate weights
- Large mixing bowl (glass or metal)
- Bench scraper or a wide spatula
- Clean kitchen towel or plastic wrap
- Dutch oven with a lid (or a heavy pot that can handle high heat)
- Banneton basket or a bowl lined with a floured kitchen towel
- Sharp knife or razor for scoring the dough
You can bake without some of these, but they make learning how to make sourdough bread much easier and more repeatable.
Simple Ingredients
At its heart, sourdough is very simple. For this easy beginner baking recipe, I usually use:
- Active sourdough starter: 100 grams
- Water (room temperature): 350 grams
- Bread flour: 450 grams
- Whole wheat flour: 50 grams
- Fine sea salt: 10 grams
This formula makes one medium loaf. You can scale it later when you feel more comfortable with how to make sourdough bread at home.
Step 2: Make Or Refresh Your Sourdough Starter
If you already have a starter, you can skip to feeding it. If not, here is a quick outline of how I build a starter from scratch. This matters because a strong starter is the main key in how to make sourdough bread that actually rises and tastes good.
Building A New Starter (Quick Overview)
Day 1: Mix 50 grams whole wheat flour with 50 grams water in a jar. Stir, scrape the sides, and cover loosely. Leave it at room temperature.
Day 2: You may or may not see bubbles. Discard about half. Add 50 grams flour and 50 grams water. Stir and cover again.
Days 3 to 7: Repeat the pattern. Keep discarding half and feeding with equal parts flour and water once or twice a day. After a few days, the starter should rise and fall predictably, smell fruity or lightly sour, and show bubbles throughout.
Once it can double in size within 4 to 6 hours of feeding, it is active enough to use. At this point, you are ready to explore how to make sourdough bread with real confidence because your “engine” is running well.
Feeding Your Starter Before Baking
On the day you plan to mix your dough, feed your starter so it reaches its peak growth around the time you start. I usually feed it in a clean jar with:
- 50 grams starter
- 50 grams water
- 50 grams flour (bread or all-purpose, or a mix with whole wheat)
Let it sit at room temperature until it looks bubbly, domed on top, and roughly doubled. This active stage is when it is strongest, which is exactly what you want when learning how to make sourdough bread the easy way.
Step 3: Mix The Dough (Autolyse + Starter)
For beginners wondering how to make sourdough bread without getting stuck in technical words, I will keep this simple, but I will also share the terms so you recognize them in other recipes.
Autolyse: Letting Flour And Water Rest
First, I like to autolyse the dough. That means I mix flour and water and let them rest before adding salt and starter.
In your bowl, mix:
- 450 grams bread flour
- 50 grams whole wheat flour
- 350 grams water
Stir until no dry flour remains. The dough will feel shaggy and sticky. Cover the bowl and let it rest for 30 to 60 minutes. This simple rest lets the flour soak up water and starts gluten development on its own, which makes the rest of how to make sourdough bread much smoother.
Add Starter And Salt
After the rest, add:
- 100 grams active sourdough starter
- 10 grams salt
Use wet hands to pinch and fold the starter and salt into the dough. I usually grab the dough, lift, and fold it over itself several times while turning the bowl. Keep going until the starter and salt look fully mixed. The dough will still be sticky, but it should feel more like one piece instead of a rough clump.
Step 4: Bulk Fermentation With Gentle Stretch And Folds
Bulk fermentation is the first long rise. When people ask how to make sourdough bread less scary, this is the stage that often worries them, because there is no strict clock. The dough, not the timer, leads the way.
How Long Should The First Rise Take
At normal room temperature (around 70 to 75°F), bulk fermentation usually takes 3 to 5 hours. Warmer kitchens will rise faster, cooler ones slower. Instead of only watching the clock, I look for these signs:
- Dough looks puffier and slightly domed on top
- You can see some bubbles on the surface or edges
- It feels softer, smoother, and a bit airy when you touch it
When you learn how to make sourdough bread, noticing these visual clues is more helpful than any fixed schedule.
Stretch And Folds To Build Strength
During the first 2 hours of bulk fermentation, I usually give the dough 3 or 4 rounds of stretch and folds, about 30 to 45 minutes apart. Here is how I do one set:
- With wet hands, grab one side of the dough, stretch it up gently, and fold it over to the other side.
- Turn the bowl a quarter turn.
- Repeat the stretch and fold from each side, usually 4 times around the bowl.
Each round of stretch and folds helps the dough gain strength and structure without harsh kneading. This gentle handling is one of the reasons I like teaching beginners how to make sourdough bread using this method. It is easier on your hands and the dough.
Step 5: Pre-Shape And Bench Rest
When the dough looks airy and has risen by about 50 to 75 percent, bulk fermentation is usually done. Now you move into shaping, which decides what your final loaf will look like.
Pre-Shape The Dough
Lightly flour your work surface. Gently turn the dough out of the bowl, trying not to smash all the air. Use a bench scraper to tuck the edges toward the center, turning it into a loose round. You do not need it perfect at this stage; you just want a rough shape.
Let the dough rest on the counter, covered with a towel or upside-down bowl, for 20 to 30 minutes. This short bench rest relaxes the gluten so final shaping feels smoother, which again helps when you are practicing how to make sourdough bread with less frustration.
Step 6: Final Shaping For A Strong Loaf
After the bench rest, the dough should feel more relaxed but still hold together. Now you do the final shape so it can rise well in the oven.
Simple Round Loaf (Boules) For Beginners
For a basic round loaf, I usually:
- Lightly flour the top of the dough and flip it over so the flour side is down.
- Gently stretch the bottom edge up and fold it toward the center.
- Repeat with the left, right, and top edges, folding them into the middle like closing an envelope.
- Flip the dough over again so the smooth side is up.
- Use your hands or a bench scraper to drag the dough gently toward you on the counter, tightening the surface until it looks smooth and round.
This tight, smooth surface helps hold the gas inside during baking. It is one of the small but important skills you pick up while learning how to make sourdough bread that looks like bakery bread.
Step 7: Proofing The Dough (Second Rise)
Place your shaped dough seam-side up in a floured banneton or a bowl lined with a heavily floured towel. I usually dust the towel with a mix of flour and rice flour so the dough does not stick.
Room Temperature Or Fridge Proof
You have two main choices now, and both work for this easy beginner baking recipe.
Short proof at room temperature: Let the dough sit at room temp for 1 to 2 hours, until it looks slightly puffier. Then bake it the same day.
Cold proof in the fridge: Cover the basket and place it in the fridge for 8 to 18 hours. This is my favorite method when teaching how to make sourdough bread to busy people. The cold slows the rise, builds more flavor, and makes the dough easier to score because it firms up.
Whichever method you pick, the dough should feel airy and a little bouncy when you gently poke it. If the dent springs back slowly but does not fill in all the way, it is usually ready.
Step 8: Baking In A Hot Dutch Oven
That crisp, crackly sourdough crust many people love comes from steam and high heat. A Dutch oven gives you both, which is why it is ideal when showing someone how to make sourdough bread for the first time.
Preheat The Oven And Pot
Place your empty Dutch oven with its lid in the oven and preheat to 475°F for at least 30 minutes. This long preheat makes sure the pot is blazing hot and ready to create steam when your dough hits it.
Score The Dough
When the pot is hot, take your dough out of the fridge if you did a cold proof. Cut a piece of parchment large enough to hold the loaf. Place it over the basket, then flip the whole thing so the dough lands seam-side down on the parchment.
Use a sharp knife or razor to make a deep slash (about 1/4 inch) across the top of the loaf. This score gives the dough a place to expand so it rises up instead of bursting randomly. That one clean cut can make a huge difference in how your sourdough looks, and it is a detail I always highlight when explaining how to make sourdough bread step by step.
Bake With Steam, Then Dry Out The Crust
Carefully remove the hot Dutch oven from the oven. Lift the dough by the parchment and place it inside the pot. Cover with the lid and return it to the oven.
Bake covered at 475°F for 20 minutes. This covered stage traps steam from the dough, helping it spring up and form a nice crust.
After 20 minutes, remove the lid and lower the temperature to about 450°F. Bake another 20 to 25 minutes, until the crust turns deep golden brown and the loaf sounds hollow when tapped on the bottom. If you have a thermometer, the internal temperature should be around 208 to 212°F.
Once you reach this stage, you have done the full journey of how to make sourdough bread from starter to baked loaf. That first crackle when you pull it from the pot is one of my favorite kitchen sounds.
Step 9: Cooling And Slicing (Do Not Rush This)
It is tempting to cut into hot bread right away, but this last step matters. Sourdough keeps cooking inside even after it leaves the oven. If you slice it too soon, the crumb can turn gummy and dense.
Place the loaf on a cooling rack and let it cool at least 1 hour, and ideally 2 hours, before slicing. The steam inside redistributes, and the flavor settles and deepens. When someone asks me how to make sourdough bread with a light, open crumb, I always mention patience at this stage. It costs nothing and changes everything.
Common Problems When Learning How To Make Sourdough Bread
Almost everyone hits a few bumps at first. Here are some of the most common issues I see, plus how I handle them.
Dense Or Flat Loaf
This often comes from under-proofing, a weak starter, or dough that never developed enough strength. Make sure your starter doubles reliably after feeding. Give bulk fermentation enough time so the dough looks puffy and airy. Add your stretch and folds so gluten can support the rise.
Overly Sour Taste
If your bread tastes too sharp, it might be fermenting too long or too warm. Try shortening bulk fermentation or using a cooler space. Feeding your starter more often can also help balance flavor. Once you get a feel for how to make sourdough bread with your own schedule and kitchen temperature, the sourness becomes much easier to control.
Sticky Dough That Is Hard To Handle
High hydration dough can feel sticky, but that is normal. Use slightly wet hands instead of adding a lot of extra flour. If it feels impossible to handle, you can reduce the water by 20 to 30 grams next time and build up as you gain confidence.
Simple Variations Once You Know The Basics
After you make this basic loaf a few times, how to make sourdough bread becomes less of a mystery and more of a fun habit. You can then start trying small changes.
Whole Grain Boost
Swap more of the bread flour for whole wheat or rye. Start by increasing the whole grain portion from 50 grams to 100 grams and see how you like the taste and texture.
Add-Ins For Flavor
Gently fold extras into the dough near the end of bulk fermentation. Some of my favorites include:
- Olives and rosemary
- Roasted garlic cloves
- Toasted seeds like sunflower or sesame
- Dried cranberries and chopped nuts
Small changes like these show how to make sourdough bread fit your own taste while you still follow the same main process.
Fitting Sourdough Into A Busy Schedule
One reason some people avoid learning how to make sourdough bread is the idea that it takes all day. The full process is long, but your hands-on time is actually pretty short if you plan a bit.
Here is a simple timeline I often use on a workday:
- Morning: Feed your starter.
- After work: Mix and autolyse, then add starter and salt.
- Evening: Do stretch and folds during the first couple of hours, then let bulk finish.
- Late evening: Shape, place in basket, and move to the fridge.
- Next morning: Bake straight from the fridge before work or on a slow weekend morning.
Once you see how to make sourdough bread fit around your life instead of taking it over, it becomes a steady rhythm instead of a big project.
Why This Easy Beginner Recipe Works
This method keeps the hydration moderate, the steps clear, and the tools simple. You do not need to master advanced scoring art or extreme high hydration right away. Instead, you build skill by repeating the same pattern and paying attention to how your dough responds.
At its core, how to make sourdough bread well comes down to three things you are now practicing: a strong starter, well-timed fermentation, and gentle handling that respects the dough. Once those pieces click for you, almost every sourdough recipe you meet later will feel easier to read and adapt.
So if this is your first loaf, be kind to yourself. Even if it is not perfect, you just guided wild yeast, flour, water, and salt into real bread in your own kitchen. That alone is a win, and it is the best way to truly learn how to make sourdough bread, one loaf at a time.